這次嘗試用Python寫一個簡易的批次修改圖片大小的工具,雖然是很基礎的應用,但還真的蠻實用的,畢竟寫部落格的照片實在不宜過大,不然會造成讀者載入文章的困擾,我通常習慣把照片調整程寬度1200px。

這次的思路一樣很簡單,如同上次寫的相片批次轉檔工具類似,使用os模組讀取指定的資料夾路徑,讀取裡面所有的照片格式的檔案(在此指定.jpg、.jpeg、.png、.bmp),將超過指定寬度的以上的圖檔加入list中,接著對list中的照片使用PILresize功能,將這些圖檔的進行維持長寬比但寬度限制為1200px的變形,最後再原檔名後面加上「_resized」的字樣另存新檔。至此基本上就可以使用了!

為了更方便使用,這次學習引入了圖形化介面tkinter模組,如此以後就不必開啟整合開發環境執行程式碼,直接點擊儲存好的.py檔案,指定使用python的方式開啟檔案,即可快速的批次處理照片。以下分享我的程式碼。下此我嘗試使用更好看的Eel模組來製作圖形化介面。
用Python寫一個批次修改圖片大小的工具

程式功能

  1. 讀取寬度超過指定寬度(px)以上的照片(例如:輸入1200)
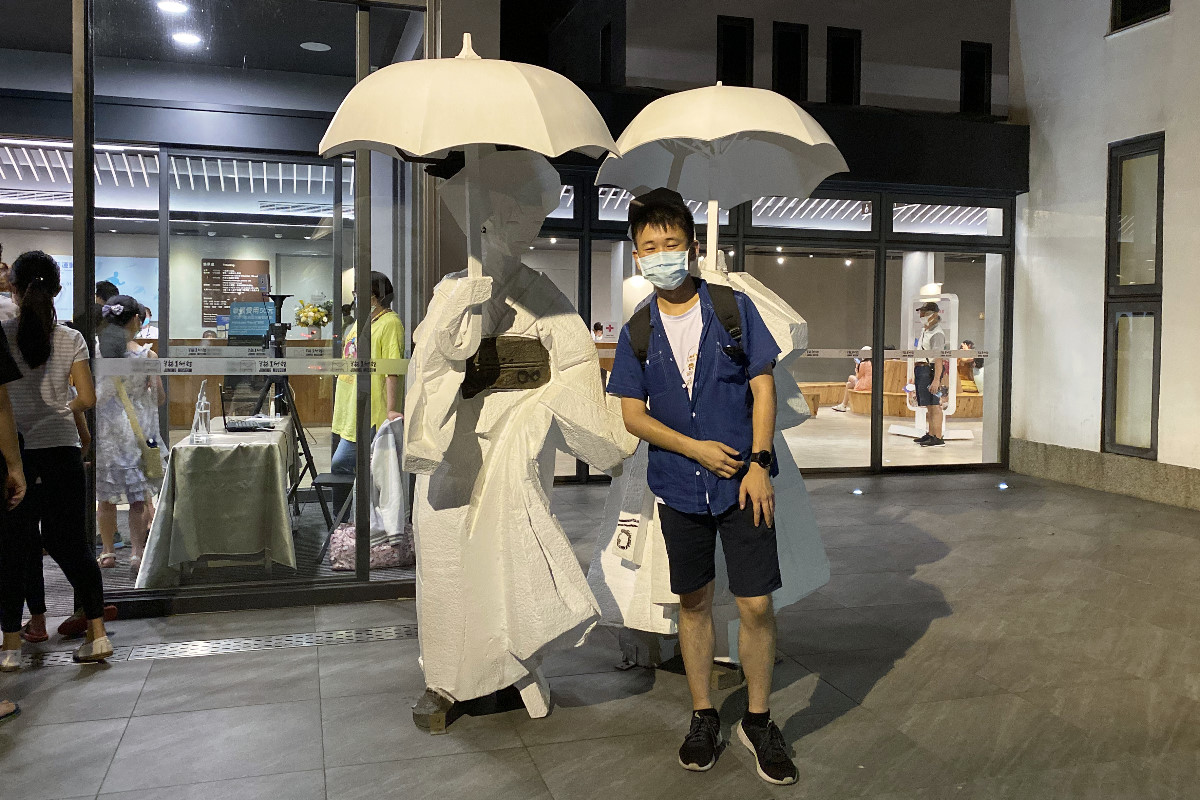
  2. 將讀取的照片修正為不改變長寬比,且寬度為指定數值的照片(例如:4096*3072→1200*900)
  3. 將程式引入GUI圖形化介面

程式需求

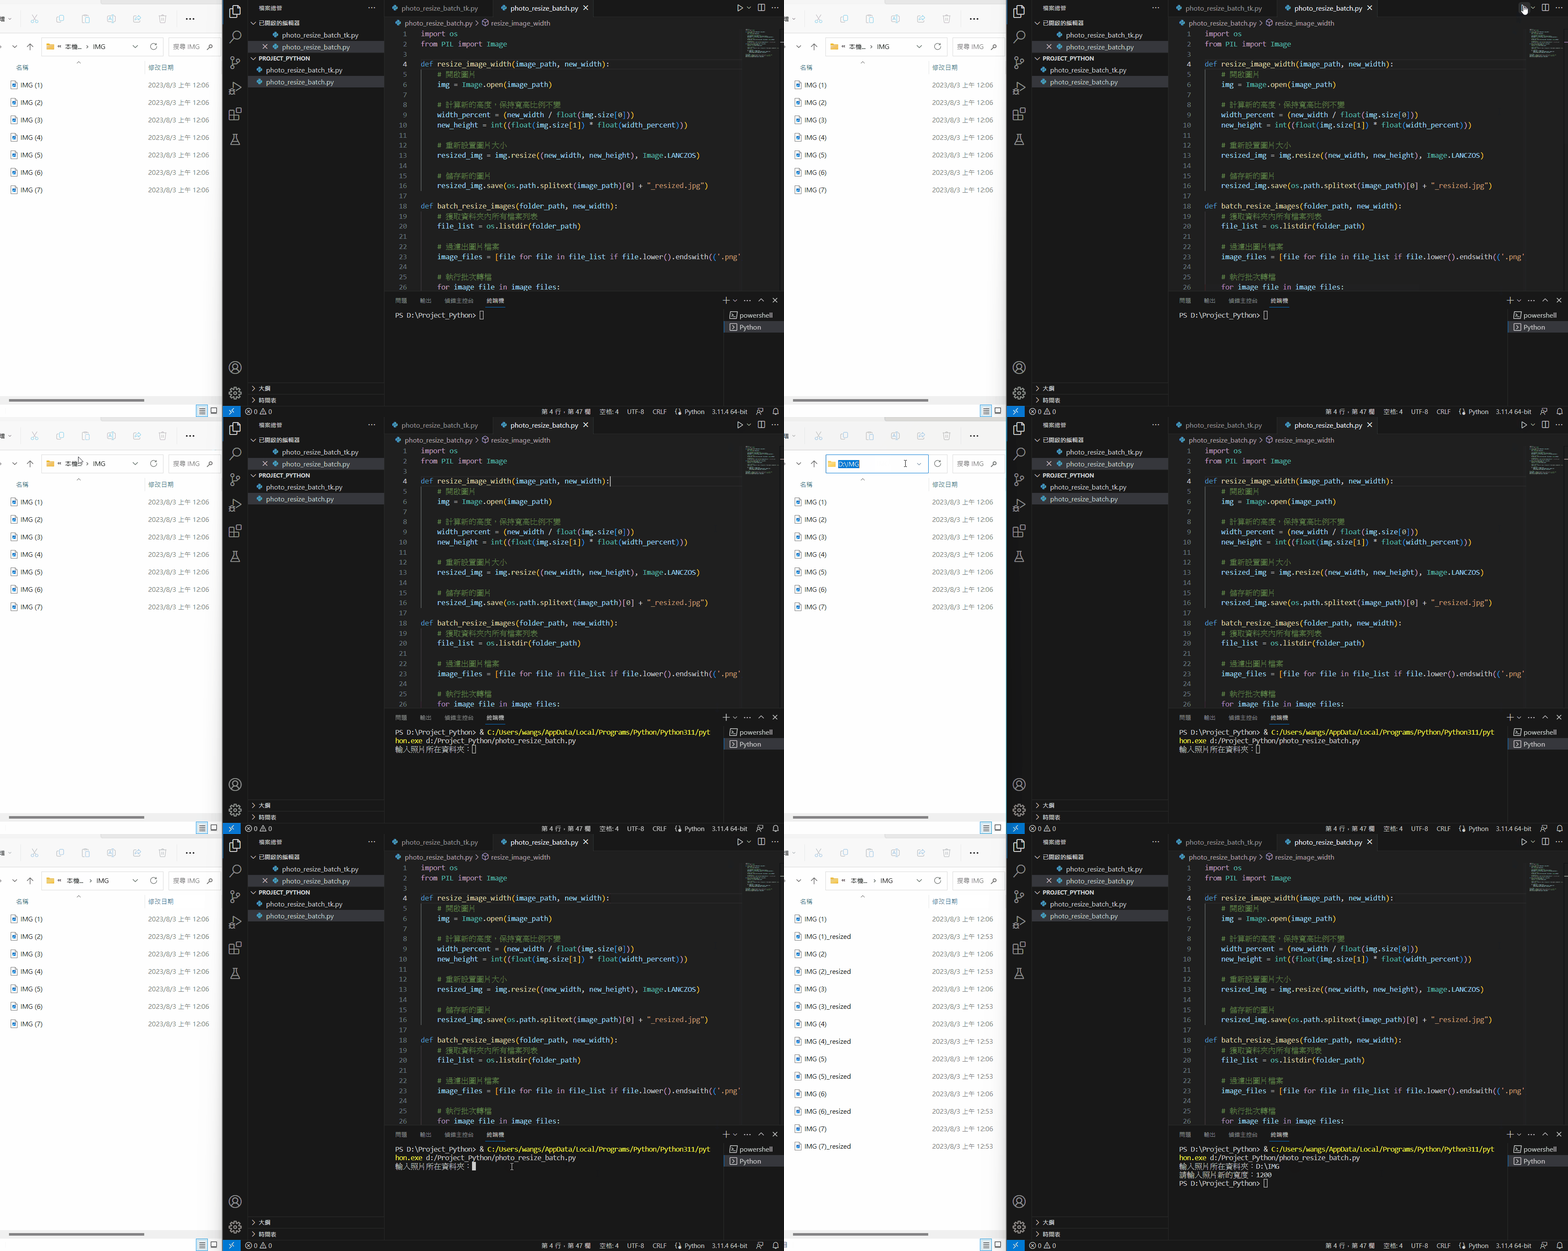
  1. 安裝Python編譯器與IDE(下圖以Visual Studio Code為例)
  2. 需要以下命令安裝這些模組
    • pip install pillow:PIL (Pillow) 是 Python 的圖像處理模組,用於處理圖像檔案
    • pip install tkinter:Tkinter 是 Python 的 GUI 模組,用於建立 GUI 應用程式

程式碼

import os
from PIL import Image
def resize_image_width(image_path, new_width):
# 開啟圖片
img = Image.open(image_path)
# 計算新的高度,保持寬高比例不變
width_percent = (new_width / float(img.size[0]))
new_height = int((float(img.size[1]) * float(width_percent)))
# 重新設置圖片大小
resized_img = img.resize((new_width, new_height), Image.LANCZOS)
# 儲存新的圖片
resized_img.save(os.path.splitext(image_path)[0] + "_resized.jpg")
def batch_resize_images(folder_path, new_width):
# 獲取資料夾內所有檔案列表
file_list = os.listdir(folder_path)
# 過濾出圖片檔案,並檢查寬度是否超過new_width
image_files = []
for file in file_list:
if file.lower().endswith(('.jpeg','.jpg','.png','.bmp')):
image_path = os.path.join(folder_path, file)
with Image.open(image_path) as img:
if img.width > new_width:
image_files.append(file)
# 執行批次轉檔
for image_file in image_files:
image_path = os.path.join(folder_path, image_file)
resize_image_width(image_path, new_width)
# 執行範例
folder_path = input(str("輸入照片所在資料夾:")) # 資料夾路徑
new_width = int(input("請輸入照片新的寬度:")) # 新的寬度
batch_resize_images(folder_path, new_width)

程式效果

用Python寫一個批次修改圖片大小的工具

程式碼(加入GUI介面)

import os
from tkinter import filedialog, messagebox
from PIL import Image
import tkinter as tk
def resize_image_width(image_path, new_width):
# 開啟圖片
img = Image.open(image_path)
# 計算新的高度,保持寬高比例不變
width_percent = (new_width / float(img.size[0]))
new_height = int((float(img.size[1]) * float(width_percent)))
# 重新設置圖片大小
resized_img = img.resize((new_width, new_height), Image.LANCZOS)
# 儲存新的圖片
resized_img.save(os.path.splitext(image_path)[0] + "_resized.jpg")
def select_folder():
folder_path = filedialog.askdirectory(title="選擇照片所在資料夾")
if folder_path:
folder_path_entry.delete(0, tk.END)
folder_path_entry.insert(0, folder_path)
def batch_resize_images():
folder_path = folder_path_entry.get()
if not folder_path:
messagebox.showerror("錯誤", "請選擇照片所在資料夾")
return
new_width = int(new_width_entry.get())
# 獲取資料夾內所有檔案列表
file_list = os.listdir(folder_path)
# 過濾出圖片檔案,並檢查寬度是否超過new_width
image_files = []
for file in file_list:
if file.lower().endswith(('.jpeg','.jpg','.png','.bmp')):
image_path = os.path.join(folder_path, file)
with Image.open(image_path) as img:
if img.width > new_width:
image_files.append(file)
# 執行批次轉檔
for image_file in image_files:
image_path = os.path.join(folder_path, image_file)
resize_image_width(image_path, new_width)
messagebox.showinfo("轉檔完成", "圖片批次轉檔完成!")
# 建立Tkinter視窗
root = tk.Tk()
root.title("圖片批次轉檔程式")
root.attributes("-topmost", True)
frame = tk.Frame(root, bg="#f0f0f0", padx=20, pady=20)
frame.pack()
h1_font = ("Arial", 20)
h1_label = tk.Label(frame, text="圖片批次轉檔程式", font=h1_font)
h1_label.grid(row=0, column=0, columnspan=3, padx=5, pady=5)
# 資料夾路徑輸入框及瀏覽按鈕
folder_label = tk.Label(frame, text="選擇照片所在資料夾:")
folder_label.grid(row=1, column=0, padx=5, pady=5)
folder_path_entry = tk.Entry(frame)
folder_path_entry.grid(row=1, column=1, padx=5, pady=5, sticky=tk.W+tk.E)
browse_button = tk.Button(frame, text="瀏覽", command=select_folder)
browse_button.grid(row=1, column=2, padx=5, pady=5, sticky=tk.W+tk.E)
# 新的寬度輸入框
width_label = tk.Label(frame, text="請輸入照片新的寬度:")
width_label.grid(row=2, column=0, padx=5, pady=5)
new_width_entry = tk.Entry(frame)
new_width_entry.grid(row=2, column=1, columnspan=2, padx=5, pady=5, sticky=tk.W+tk.E)
# 開始轉檔按鈕
convert_button = tk.Button(frame, text="開始轉檔", command=batch_resize_images, bg='pink')
convert_button.grid(row=3, column=0, columnspan=3, padx=5, pady=10, sticky=tk.W+tk.E)
root.mainloop()

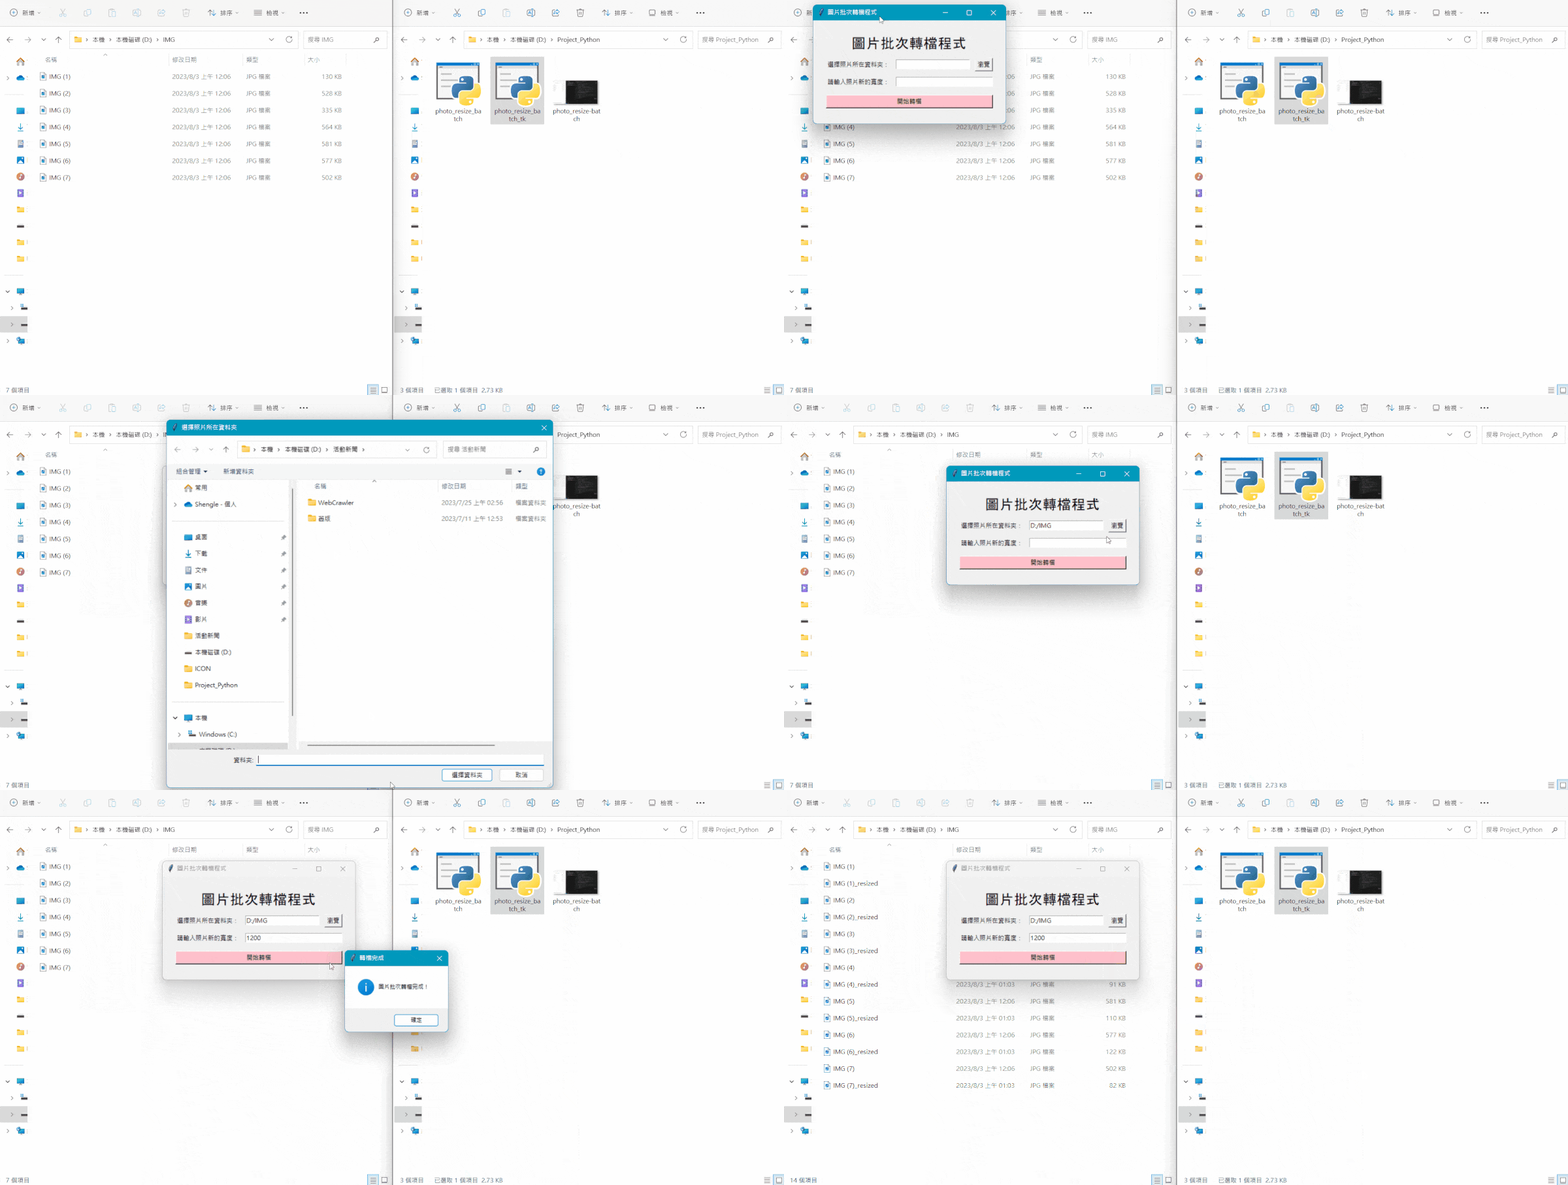
程式效果

用Python寫一個批次修改圖片大小的工具

Python學習紀錄
Python基礎語法
主題 文章
編譯器與IDE
  • 註解:Comments
  • 模組:pip install.Module
  • 印出:print
  • 資料型態:numbers.string.list.tuples.dictionary
  • 運算:算數運算子.關係運算子.邏輯運算子
  • 判斷式:if else
  • 迴圈:while.for
  • 自定義函數:def
  • 矩陣:Array
  • 迭代器:Iterators
  • 物件導向:類(Classes).物件(Objects).封裝(Encapsulation).繼承(Inheritance).多型(Polymorphism)
  • 讀取儲存:Files I/O
  • 資料儲存:Json
  • 嘗試:Try Except
  • 互動:Input
  • 日期:Date
常用模組
  • Math:數學
  • Numpy:矩陣與線性代數運算
  • Random:隨機數
  • Matplotlib:資料作圖
  • OpenCV:影像資訊處理庫
  • pandas:配合Excel、CSV、Jason等數據處理
影像處理
  • 影像讀取與屬性修改
  • 網路攝影機
網路爬蟲
  • 網站爬蟲:Web Crawler
圖形介面
  • Tkinter:基礎GUI介面
  • PySide:Qt框架的GUI介面
  • CustomTkinter:基礎GUI介面美化版
  • Eel:結合html、JavaScript、CSS的網頁GUI介面
檔案打包
Python應用學習
主題 文章
影像應用
  • 圖像辨識
  • 肢體追蹤:Google MediaPipe
機器學習
  • 數據讀取
  • 資料預處理
  • 訓練集與測試集
  • 特徵縮放
  • 代入模型
  • 模型訓練與學習率測試
  • 損失函數:均方誤差.二元交叉熵.Scikit-Learn
深度學習
  • Keras
  • PyTorch
  • TensorFlow
語言分析
  • SnowNLP
  • Bert WWM
圖像生成
  • Stable Diffusion
寫一點小工具
小小作品
Python學習資源
常用網站
編輯 ] 筆記 » 程式語言 » Python
Python|HTML|CSS|JavaScript|Blender|Unreal Engine

0

Facebook留言

Wordpress留言 (0)

發佈留言

發佈留言必須填寫的電子郵件地址不會公開。 必填欄位標示為 *

關於我們 | 隱私權政策